Import student information into Easy Grade Pro (existing template)
[Importing an updated version of the file will add new students to your gradebook, but will NOT erase the grades of the students already in your gradebook. It will update information on students, based on the id numbers recorded in the file. This includes erasing any contact information that you have changed.]
This assumes that extract files have been created already.
Launch Easy Grade Pro and select or create the class with which you wish to work.
If creating a new gradebook, select Import Classes
Otherwise, from
the File menu, select Import
·
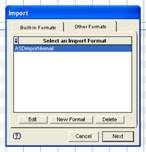 On
the Other Formats tab, select the ASDimport4email format. If it is not available, see the other
instruction page for the creation of a Format.
On
the Other Formats tab, select the ASDimport4email format. If it is not available, see the other
instruction page for the creation of a Format.
· Click Next and select either the Current Class or New Class.
· Navigate to where you saved your extract files and select one of them. (Note: on a Macintosh, you must change the File Type shown in the lower left from Text to All Files, before they can be selected)
Click Next and Import Records.
Repeat as needed…
To change the custom column headings, select the Student Tab and double-click on any student name. Highlight any of the Custom Labels, and type in the name that you wish. This will change for all of your classes.
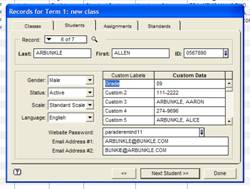
You might wish to delete the two header lines that were imported with your students. Highlight the row and press the Delete key.
Note that Easy Grade Pro is disk-based rather than memory based, meaning that everything is saved automatically as you work. You can save backup copies, but make sure you keep track of which is your master.
Return to Easy Grade Pro index
Instructions updated: 10/16/06 prt